There are two components to stopping Steam updates. The first is preventing automatic updates, and the second is editing a file that flags a specific piece of software for updates. In this article I’ll go over both components using the game Beat Saber as an example.
tl;dr instructions
If you don’t need too much hand holding, there’s the quick version of the instructions:
- Right click game in Steam, go to
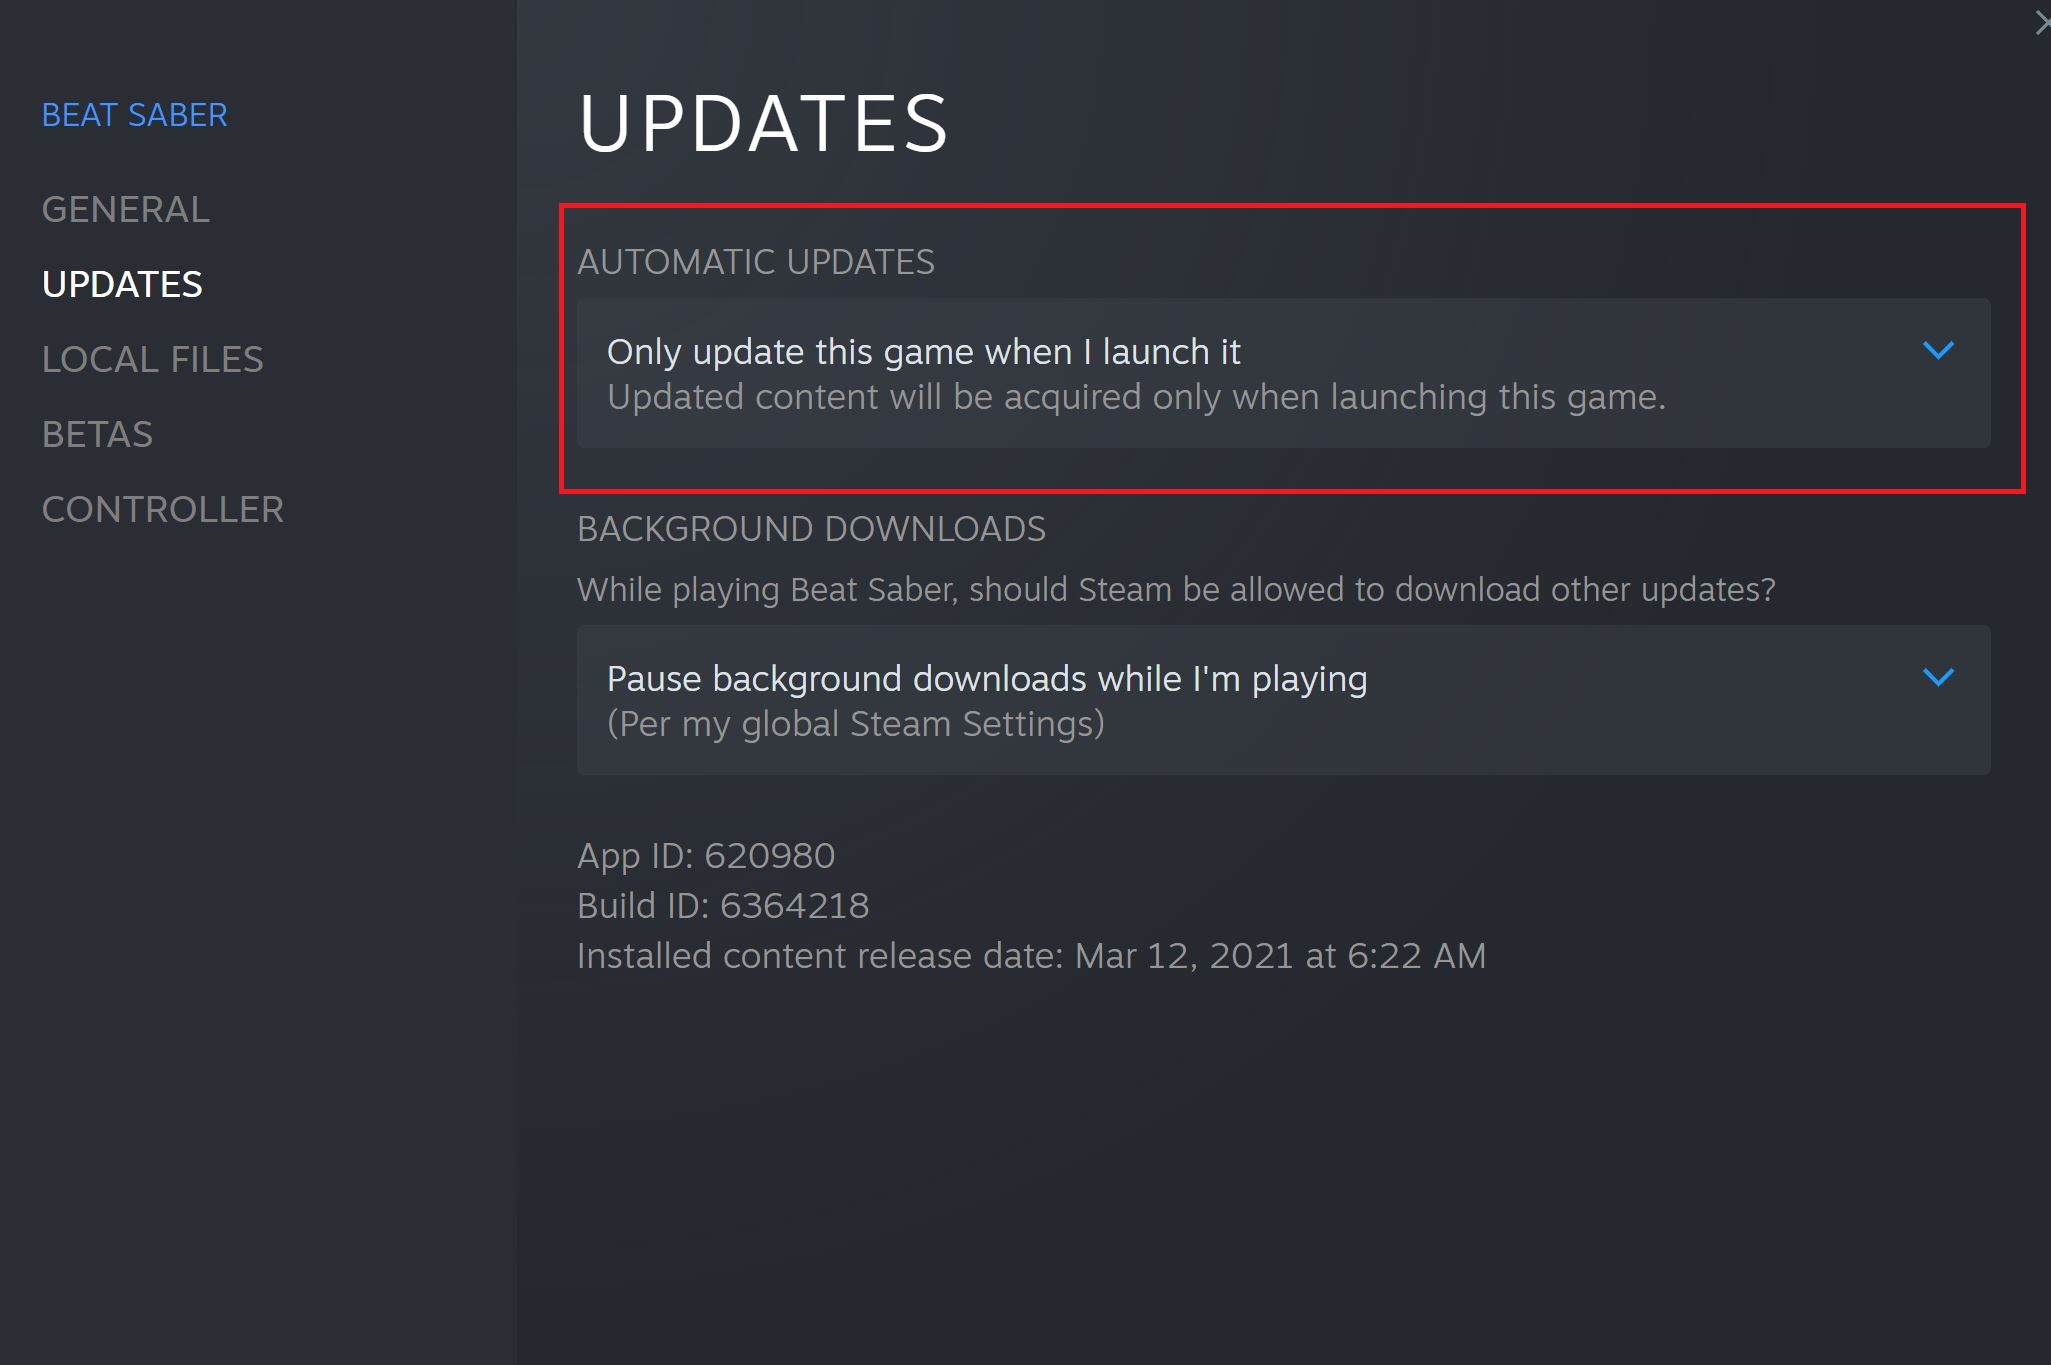
Properties >> Updates, selectOnly update this game when I launch it. - Next time an update rolls around it’ll say
Update Pendinginstead of auto-updating. - Navigate to your
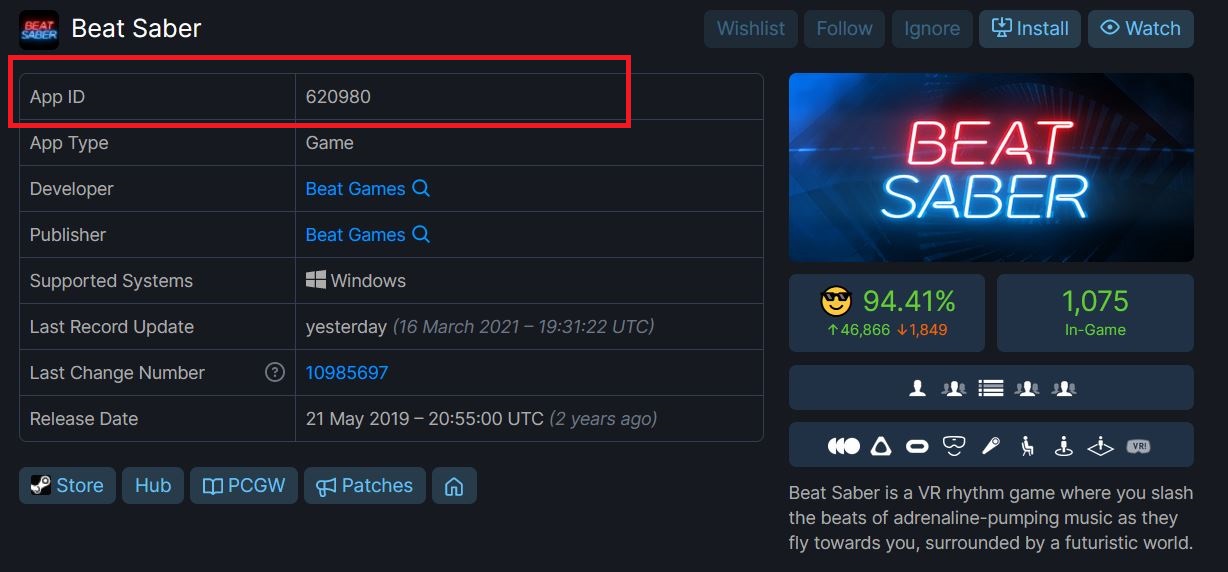
steamappsdirectory, edit the manifest file that corresponds to your game’s App ID, which can be found on steamdb. - Edit the StateFlags field from 6 to 4.
- Edit the manifest field from the old game depot manifest to the new one. This can be found on the
Historytab of the game’s Steamdb page. - Restart Steam, done.
If the above instructions seem hard, they aren’t. You can follow along with the rest of the article and you should be done within the next couple minutes.
Guided instructions
Preventing automatic Steam updates
This is easy. In your Steam library, right click the game and select Properties. Then, under Updates, set it to Only update this game when I launch it.

For good measure I also change the time automatic updates can take place. I don’t think this step is necessary, but whatever. It’s under the universal Steam settings at Settings » Downloads » Download Restrictions. Check Only auto-update games between and select hours you’re never on your pc.
Launch game without updating
Now the game won’t auto-update until you launch it next, and when there’s an update it’ll say “Update pending” in the Steam library. Of course if you just launch it now, it’ll simply update itself. So how do you prevent that?
For this we’ll edit the manifest file. First you need to get the game’s ID, which you can find on steamdb.info. Search your game name, then you’ll see a field called App ID. This is the ID of your game.

Now open up explorer and navigate to your Steam Library. By default this is C:\Program Files\Steam\steamapps\, but if not, you can find where your files are by right clicking a game in your Library, and going to Manage >> Browse Local Files, then navigating upwards to steamapps.
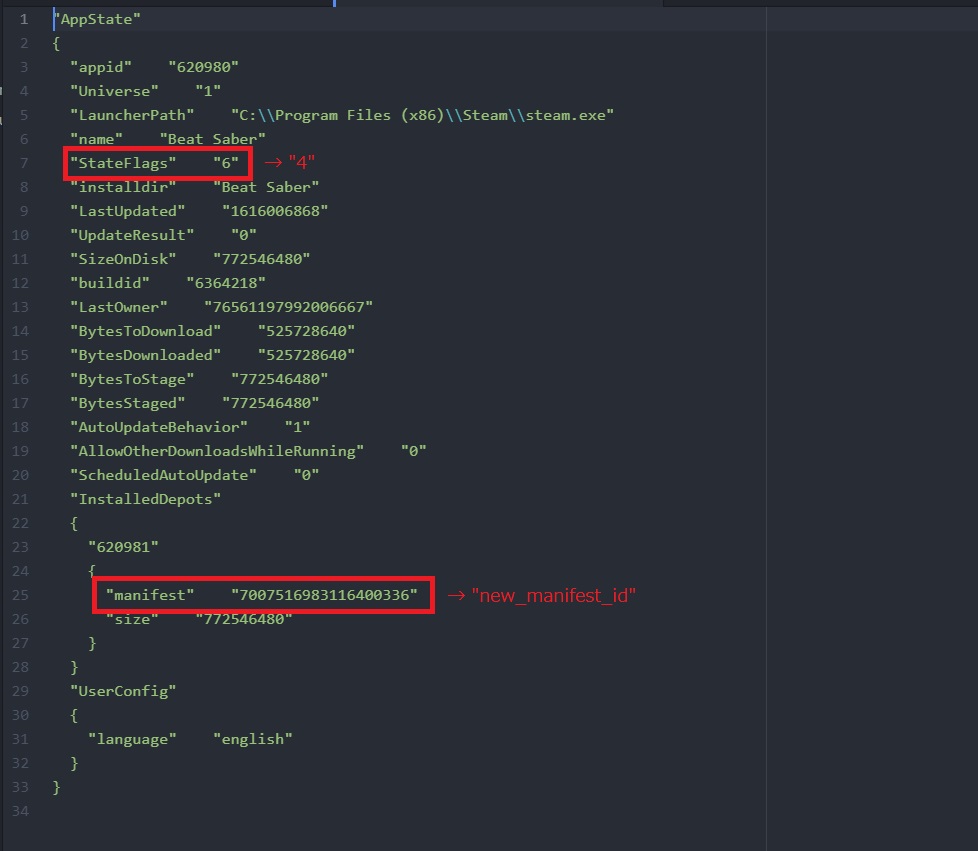
Once you’re in steamapps you should see some files called appmanifest_X.acf where X represents a game ID. Open up the appropriate manifest file in any text editor and you’ll see it’s just a standard YAML file. For Beat Saber this would be appmanifest_620980.acf.
There are two fields we need to change in here.

Updating the StateFlags
The first is StateFlags, which will most likely be set to 6 if the game is marked for an update. Update it to 4.
"StateFlags" "4"
Basically, a value of 6 tells Steam that the game needs to be updated, whereas a value of 4 says no update is needed.
Updating the manifest value
Next up you need to find the manifest, which should be under InstalledDepots. Whatever manifest value you have in there right now probably corresponds to the currently installed version of the game, and you need the newly updated value. You can find this on steamdb as well, under the History tab.
Grab the old manifest value from your .acf file and search it up in the History tab.
You’ll see a line somewhere that says Depot manifests: oldvalue > newvalue

Grab the new manifest ID and paste it into your acf file, replacing the old value (retaining the quotes).
Now save the file and you’re all done. Restart Steam and the game shouldn’t be marked for an Update anymore.